This article provides step by step instructions on how to setup Aspida Mail on iOS 13. The process should be similar with other versions of iOS.
Tap Settings on the home screen.
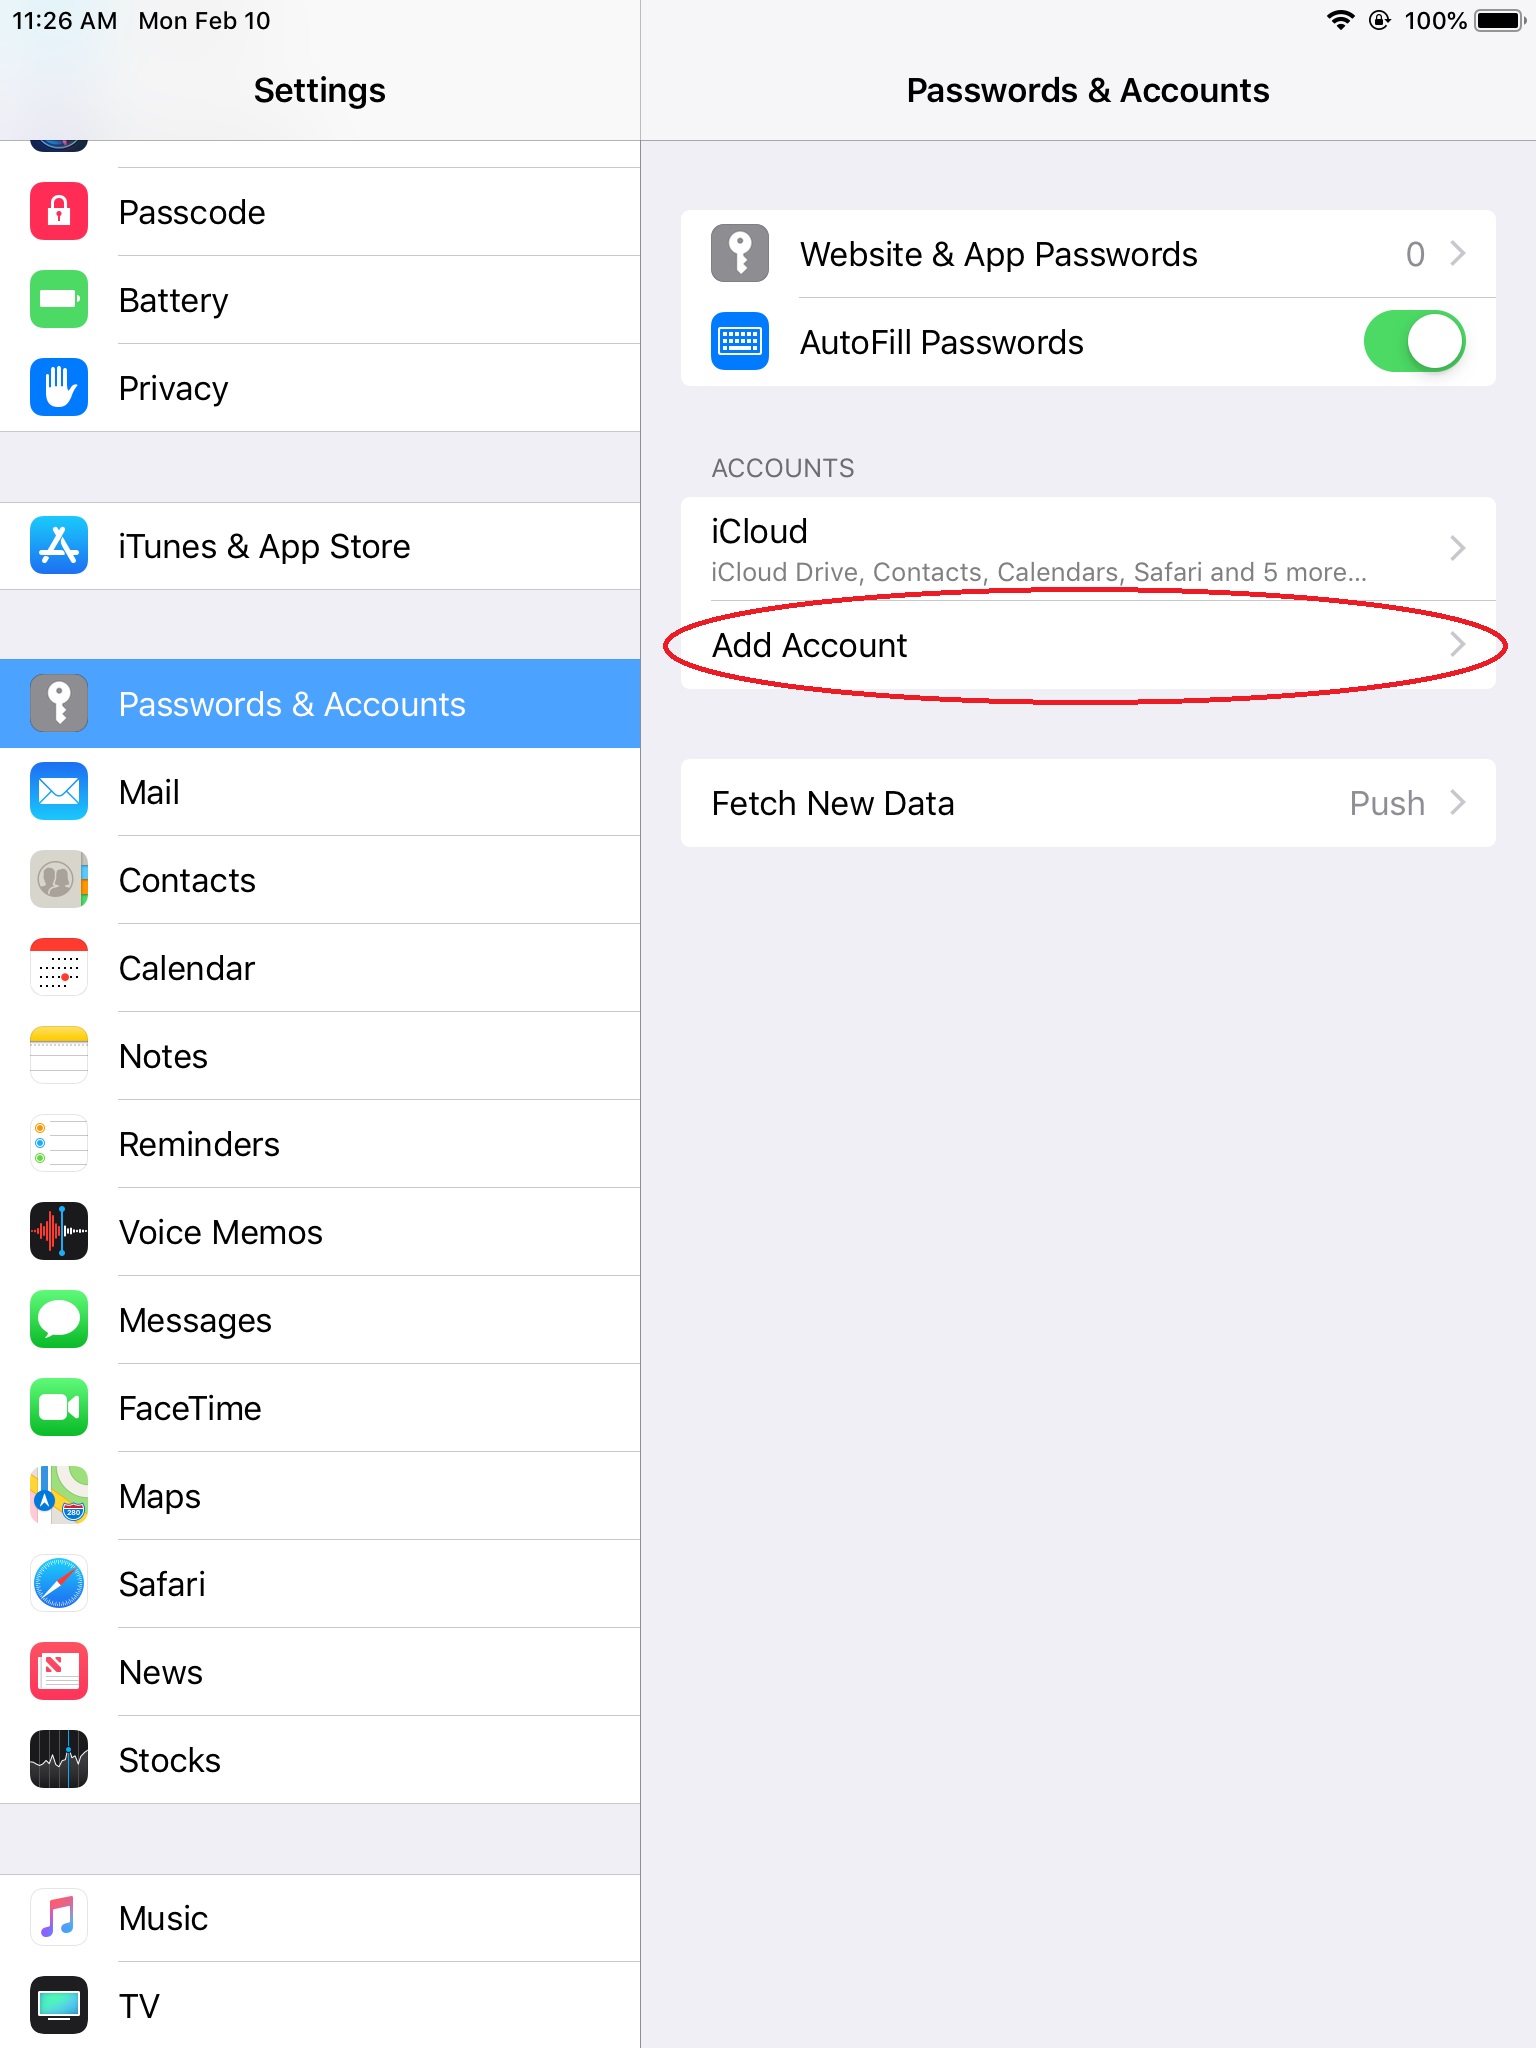
Tap Passwords & Accounts then tap Add Account.
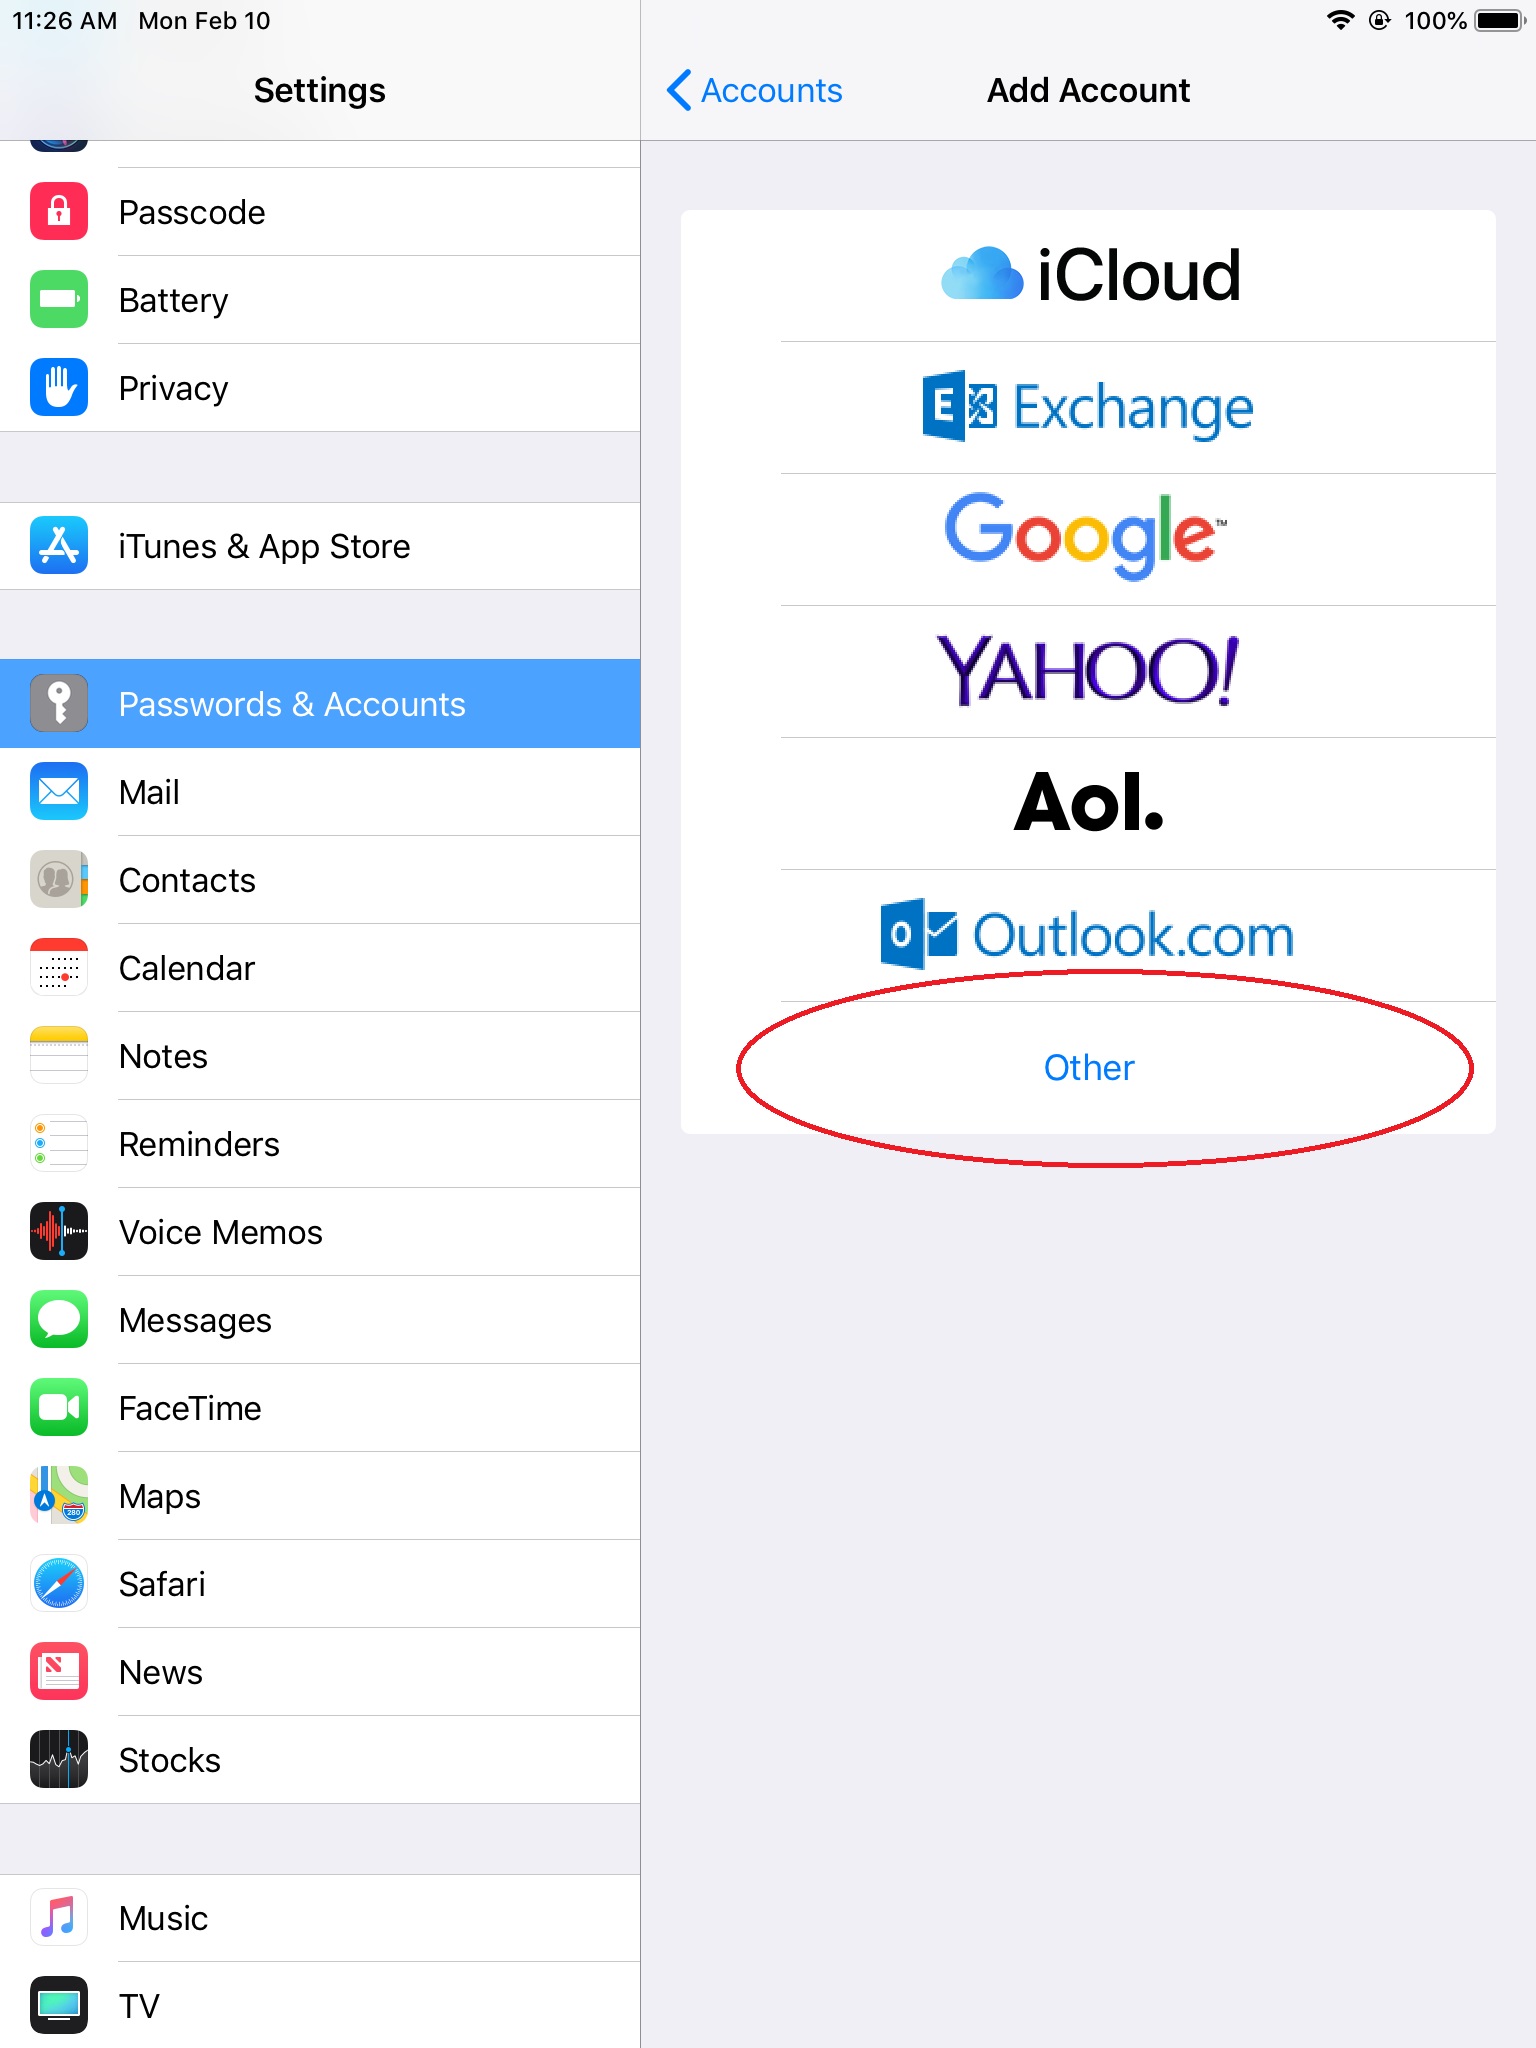
Tap Other in the e-mail list options.
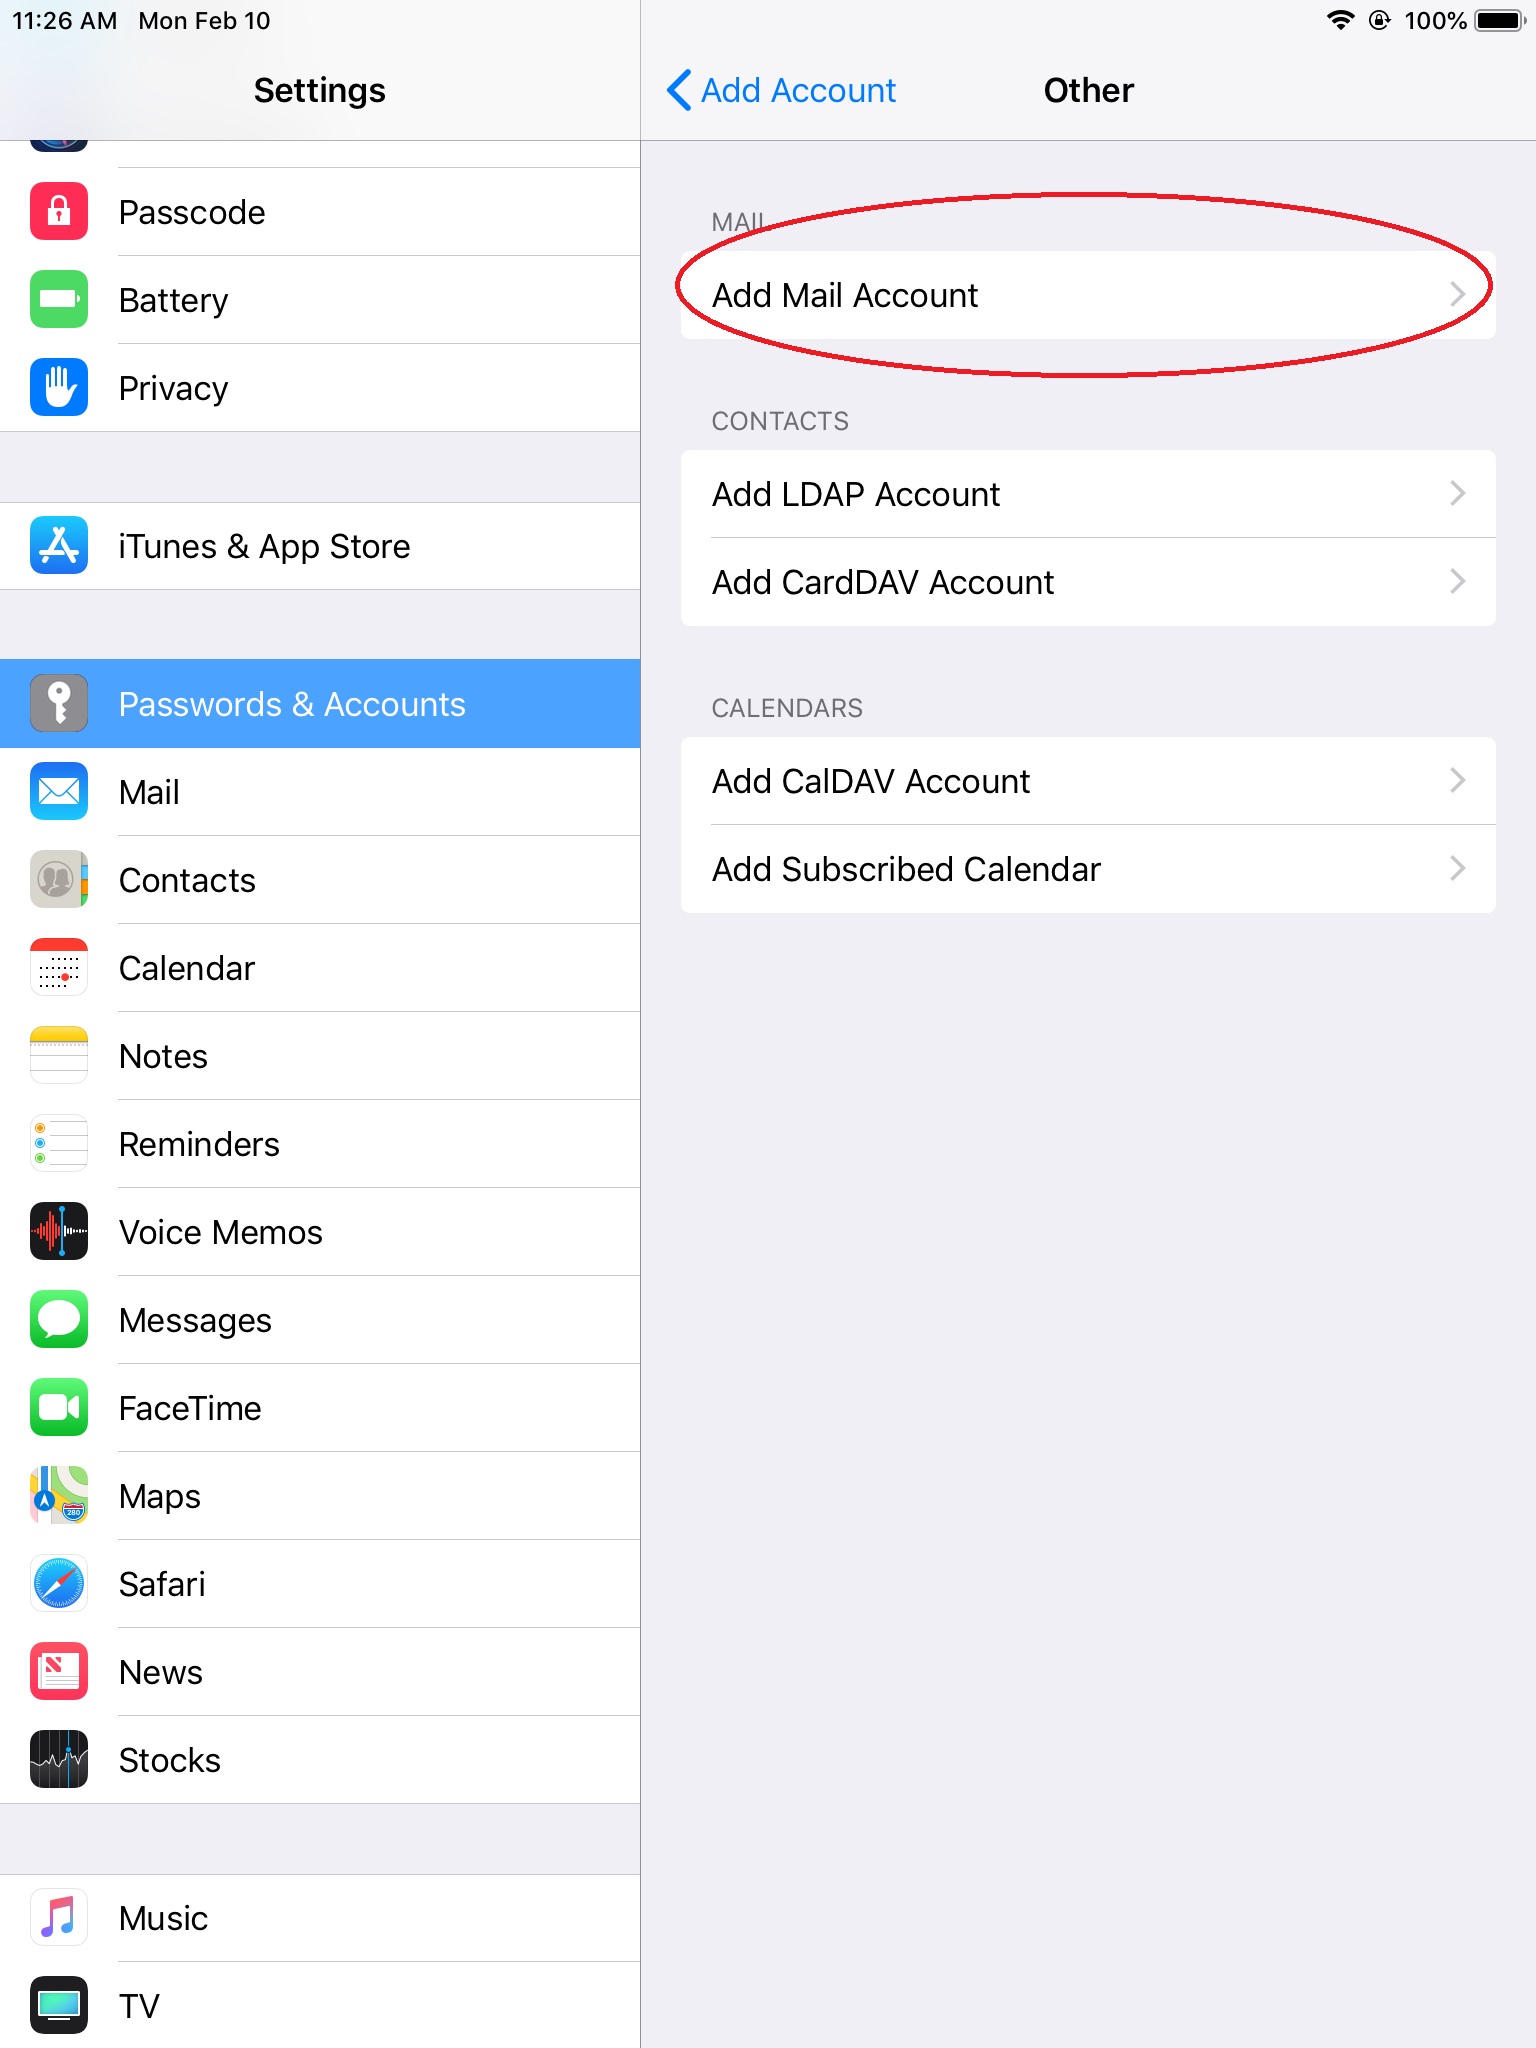
Tap Add Mail Account.
Enter your full Name, followed by your Email address, Password, and a Description for the e-mail account.
Tap Next to continue.
Make sure IMAP is selected at the top.
In the Incoming Mail Server section:
- For the Host Name enter the Aspida mail server name that your domain and e-mail is hosted on. This should have been provided to you in a welcome e-mail when your account was created.
- For the User Name enter your email address.
- For the Password enter your email password.
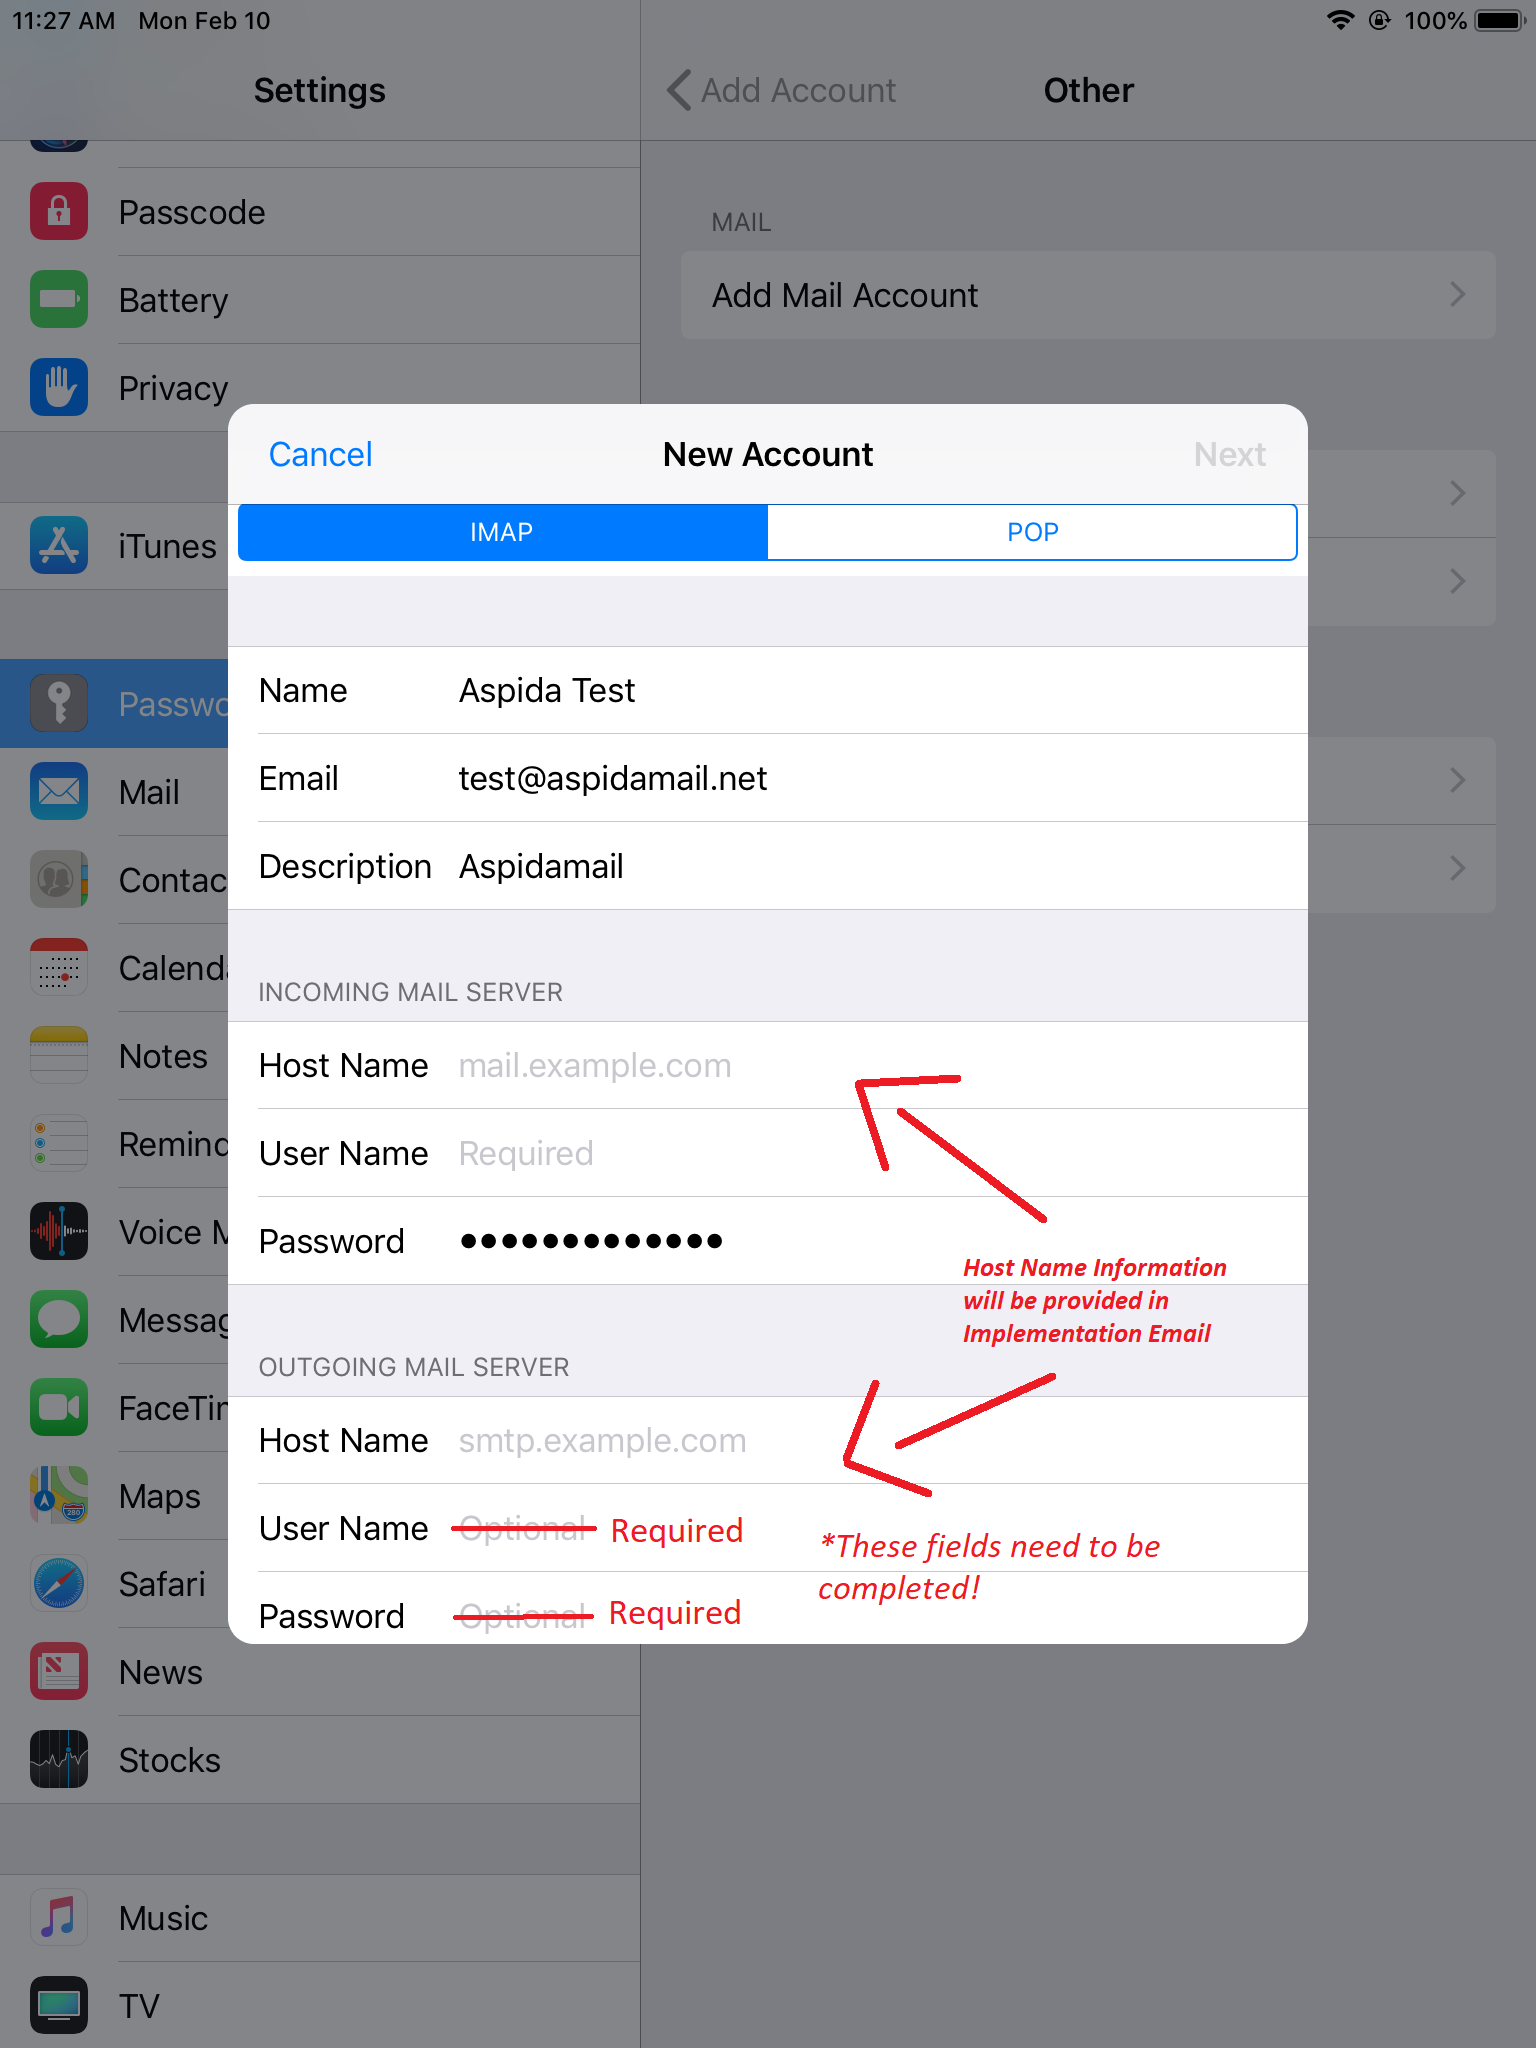
In the Outgoing Mail Server section:
- For the Host Name enter the Aspida mail server name that your domain and e-mail is hosted on. This should have been provided to you in a welcome e-mail when your account was created.
- For the User Name enter your email address.
- For the Password enter your email password.
Tap Next to continue.
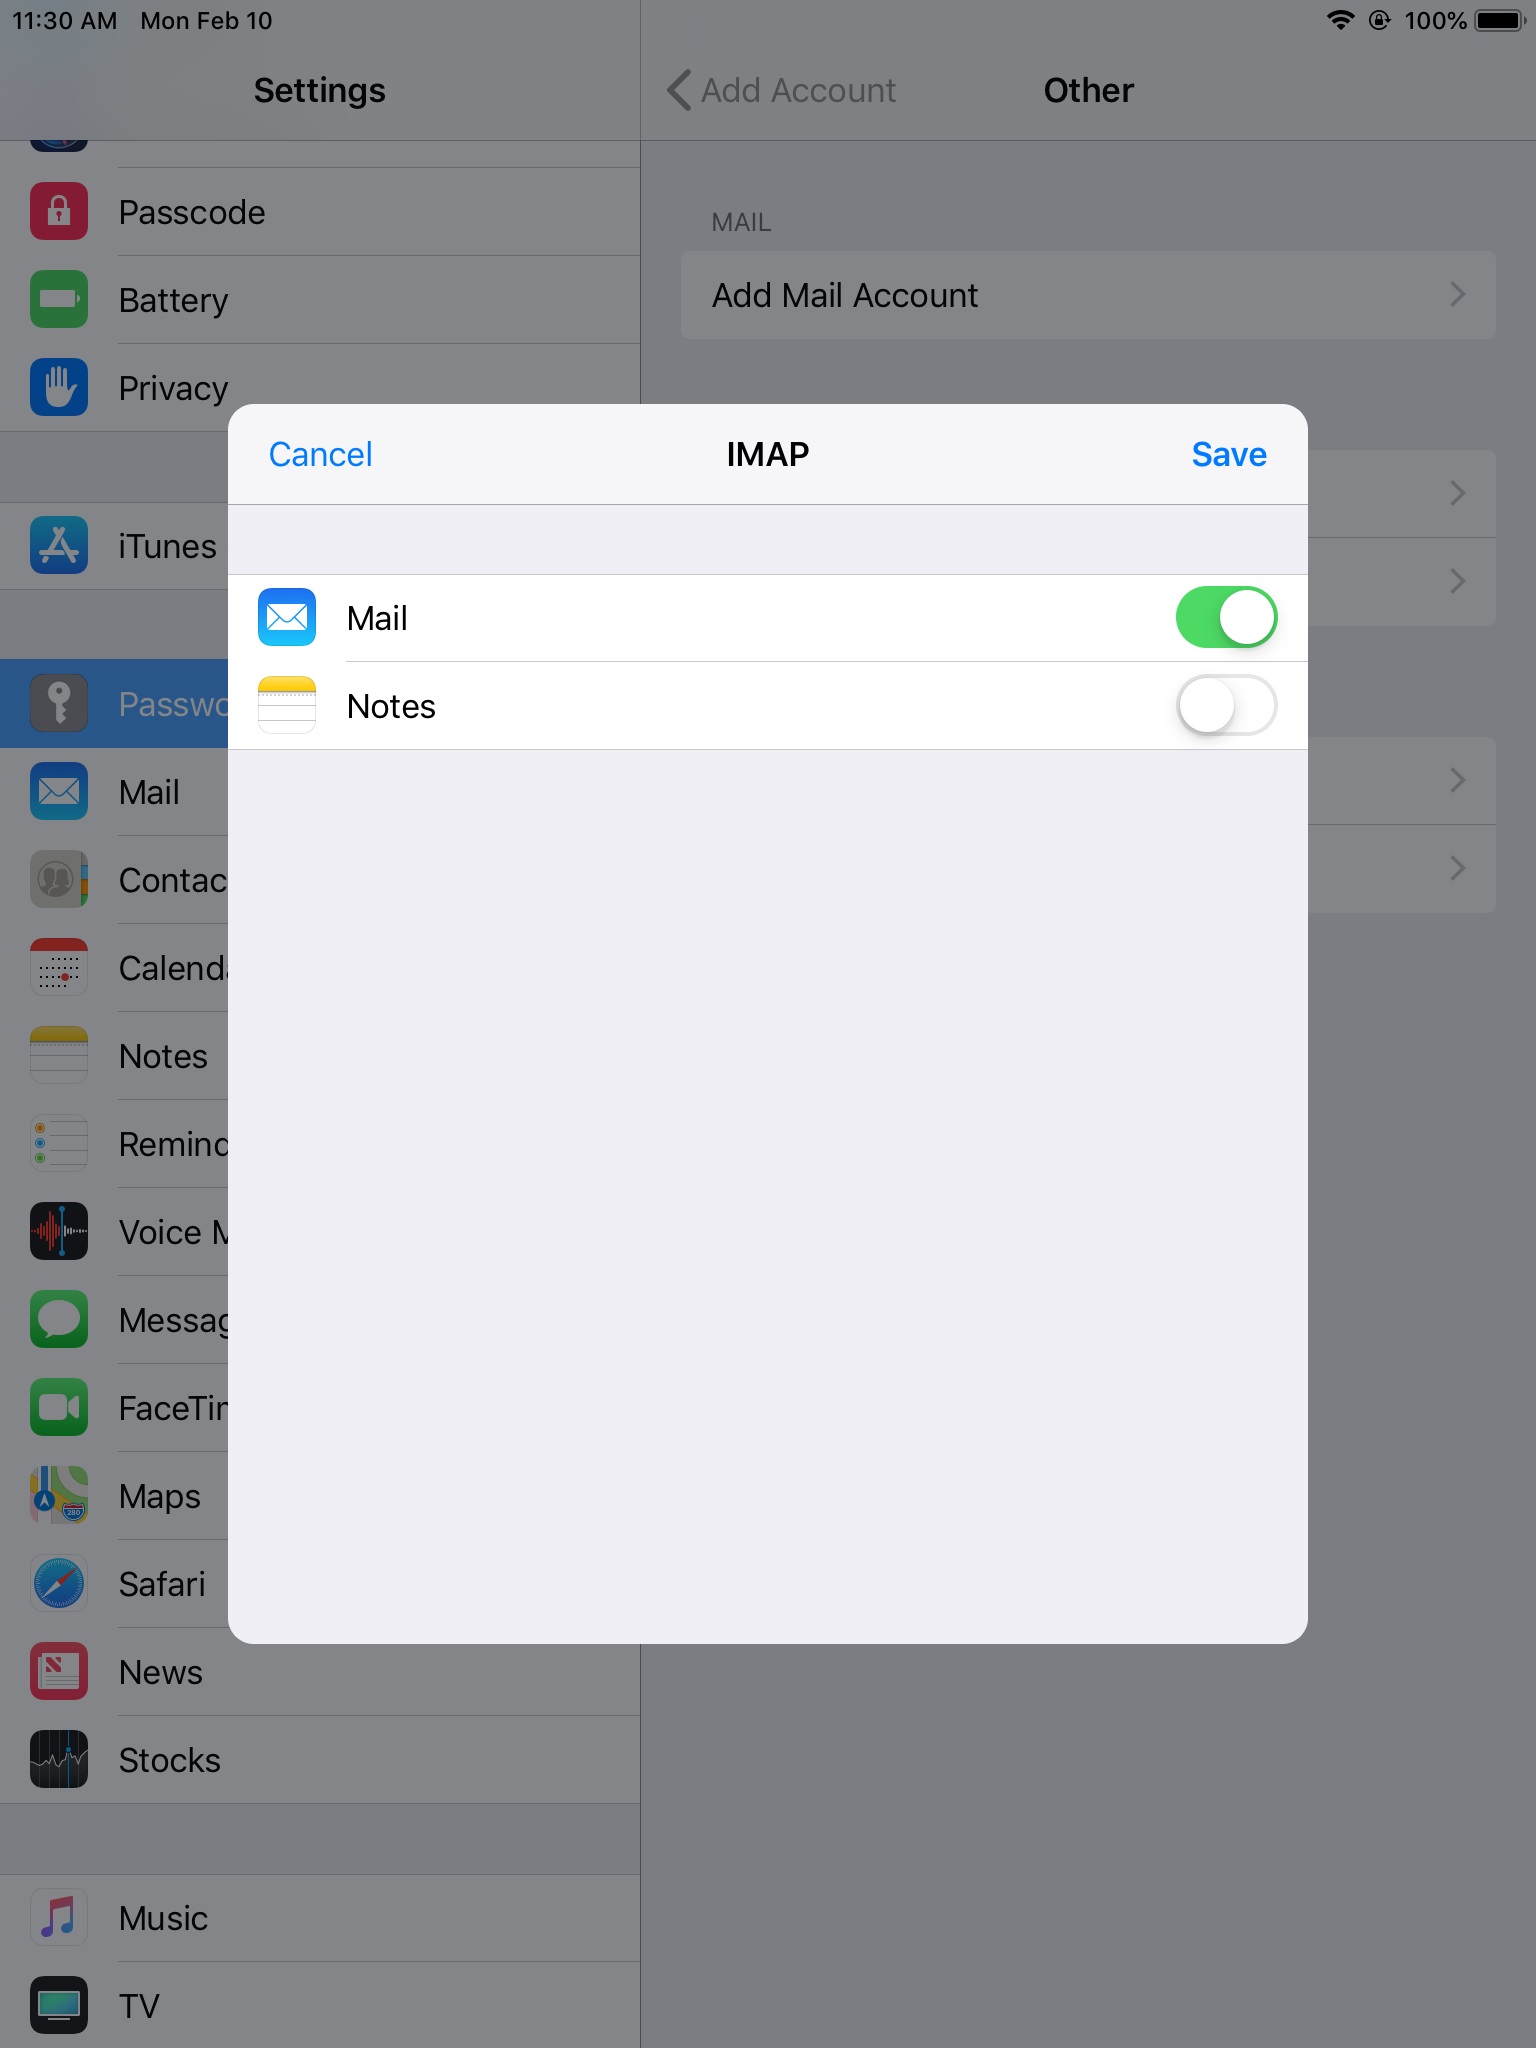
Enable the Mail option by tapping the slider next to the “on” position.
Tap Save.
When the check is finished you will be redirected to Passwords & Accounts screen.
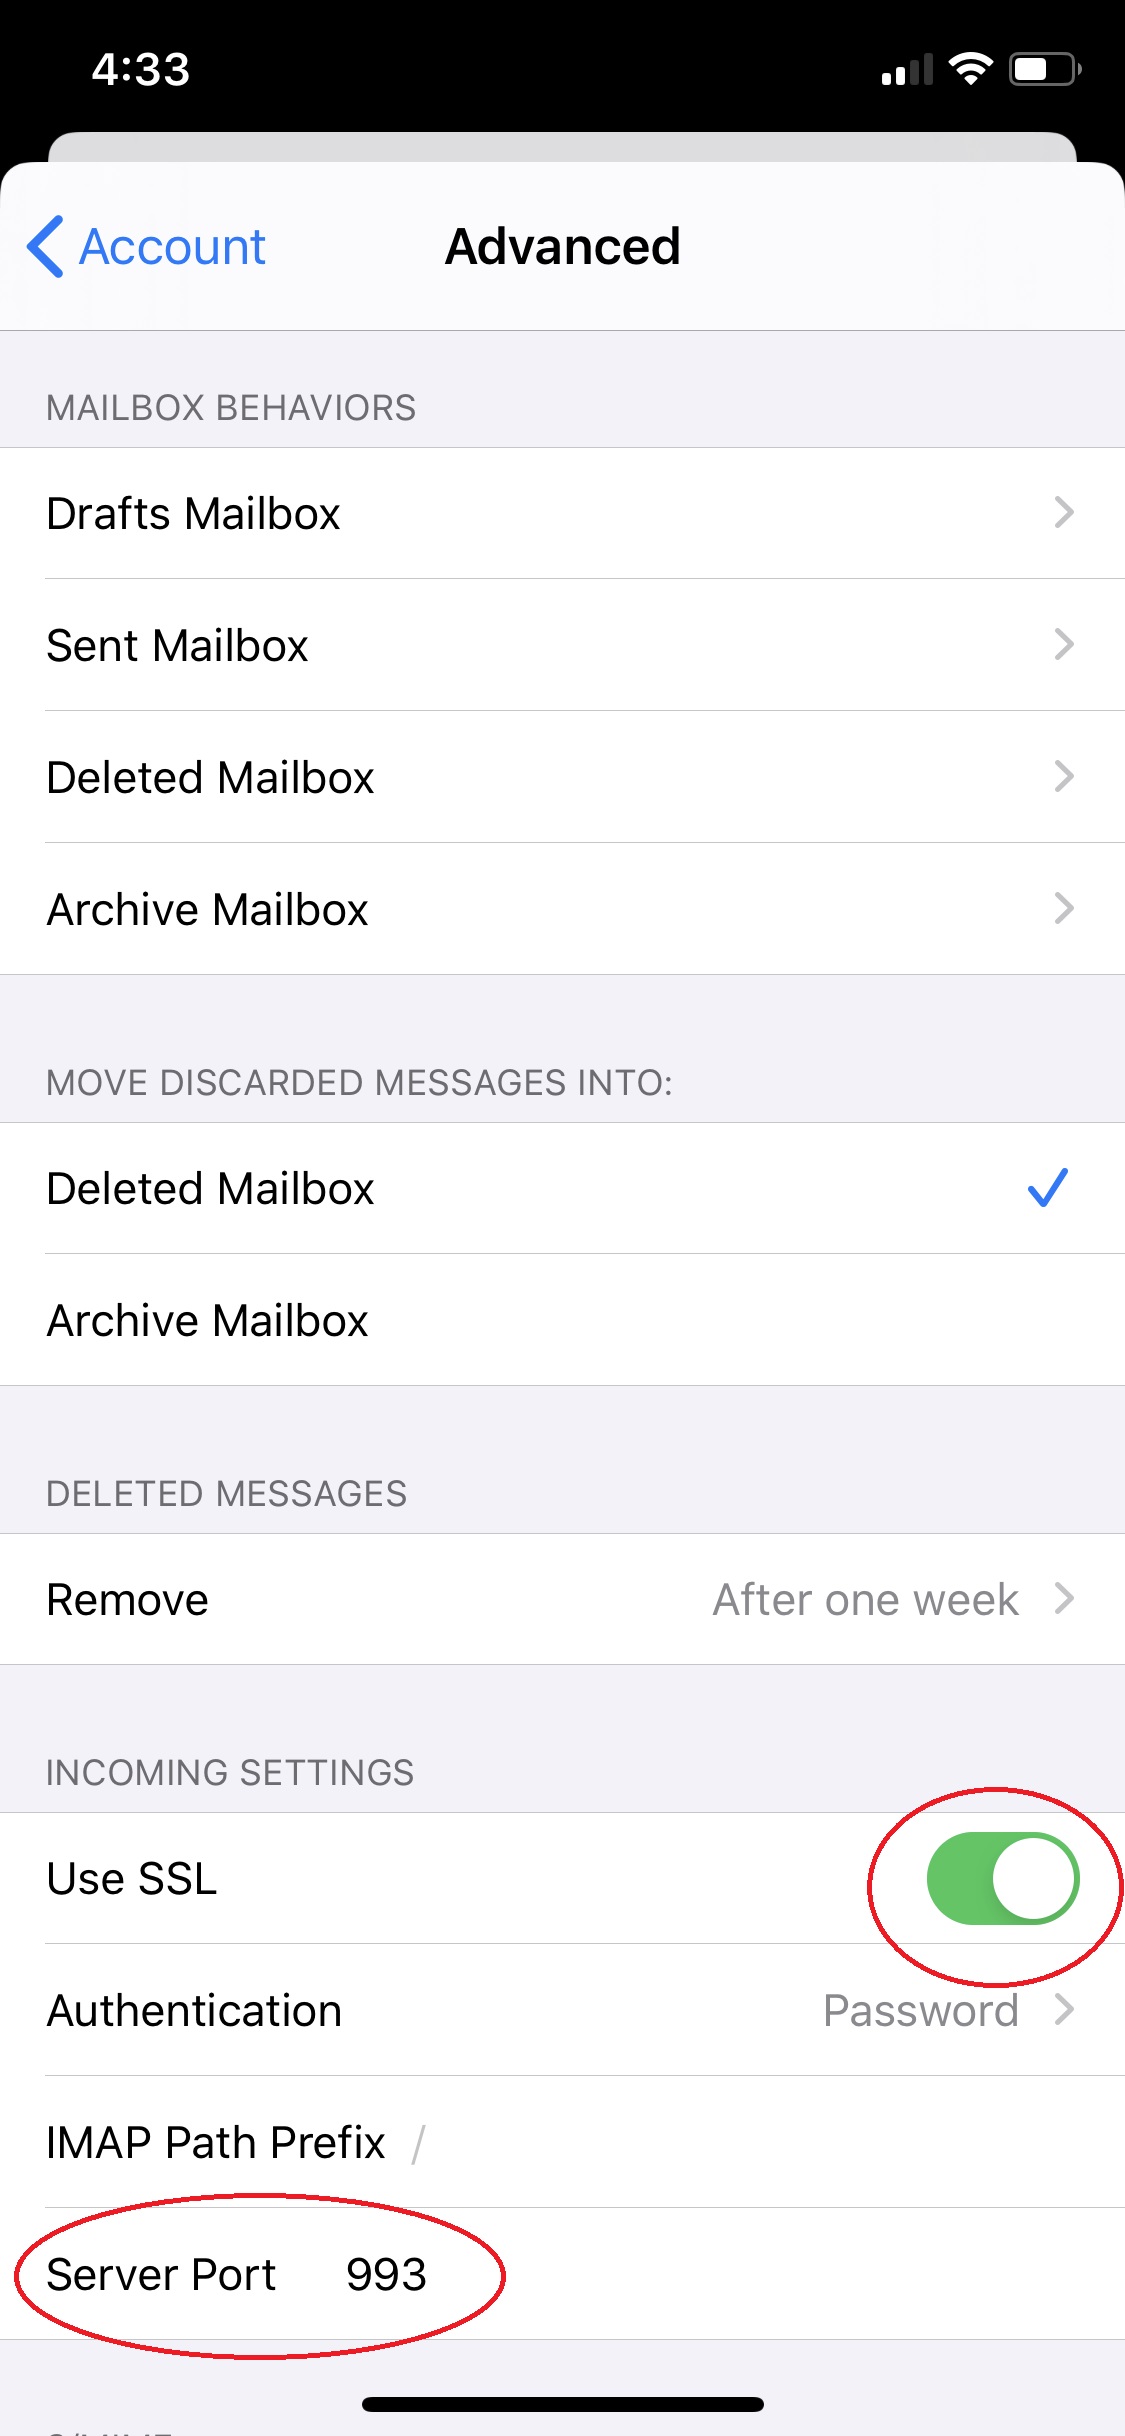
On the Account screen, tap on the Advanced button. Next make sure that the Server Port is set to 993 and Use SSL is green.
Once that is Saved, go back to the Accounts screen. Tap on SMTP under Outgoing Mail Server. Tap on Primary Server. Make sure that port is set to 465 and Use SSL is green.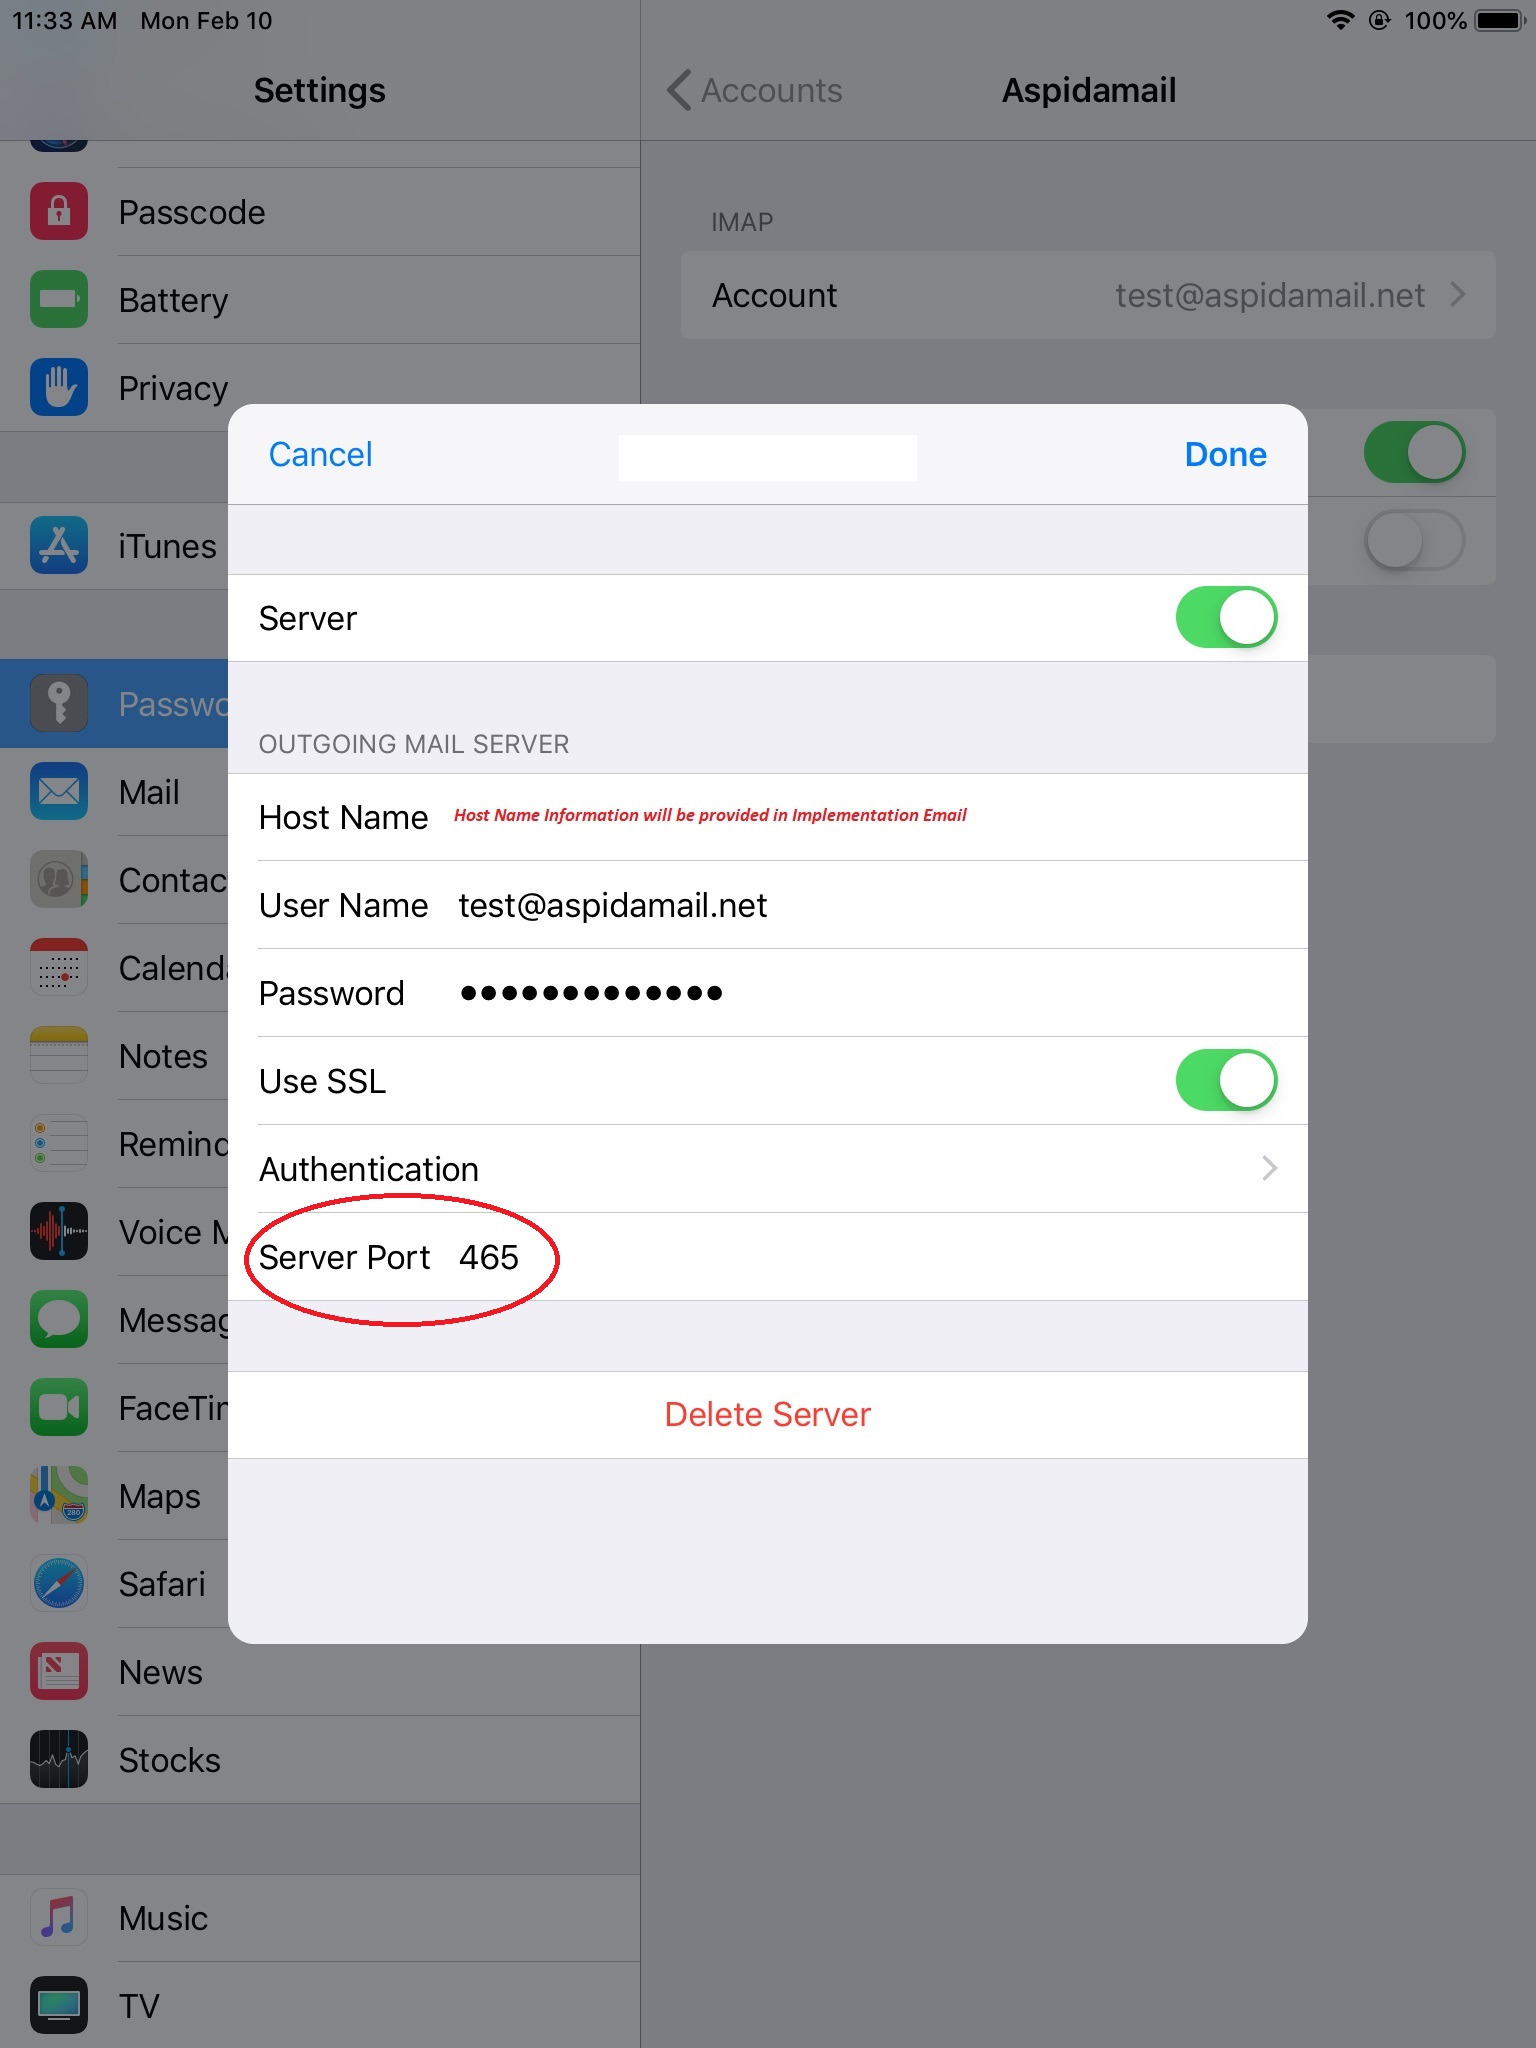
Assuming you entered all the correct information the configuration should be complete and you should access to your Aspida Mail on your iPad.
