Any desktop email client that supports IMAP, SSL, and TLS can be configured to access ASPIDA Mail. This article describes the setup process using Microsoft Outlook 2007.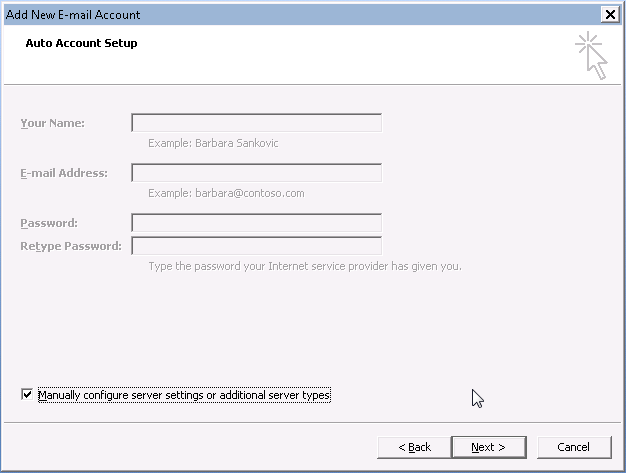
Select Manually Configure server settings or additional server types and click the Next button.
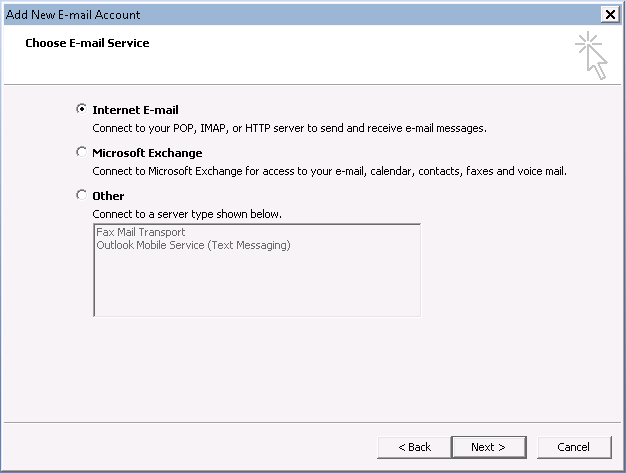
Select Internet email and click the Next button.
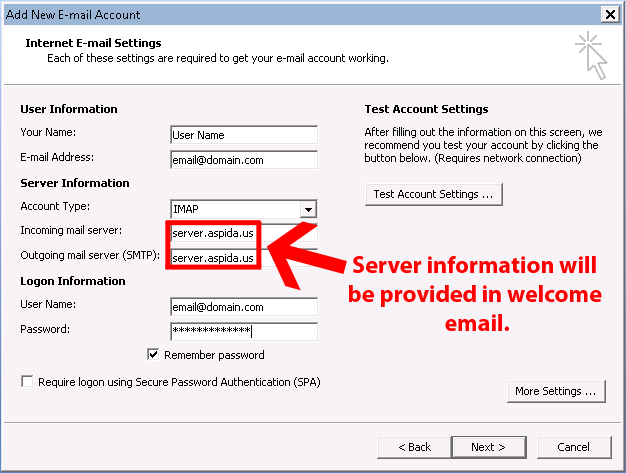
In the User Information section.
- Enter your name in the Your Name: text box.
- Enter the ASPIDA Mail email account in the email Address: text box. (This is the email account on your domain that belongs to you. This information was provided to you by an ASPIDA support specialist. For example [email protected])
In the Server Information section.
- Select IMAP for the Account Type:
- Enter the ASPIDA mail server name assigned to your domain in the Incoming mail server: text box. (This can change depending on which mail server your domain is hosted on. Once your email domain is configured with ASPIDA Mail you will receive confirmation identifying the incoming and outgoing mail server.)
- Enter the ASPIDA mail server name assigned to your domain in the Outgoing mail server (SMTP): text box. (This can change depending on which mail server your domain is hosted on. Once your email domain is configured with ASPIDA Mail you will receive confirmation identifying the incoming and outgoing mail server.)
In the Logon Information section.
- Enter your ASPIDA Mail email account in the User Name: text box.
- Enter your ASPIDA Mail password that has been provided to you in the Password: text box. If your account is integrated with Active Directory then you will need to use your domain password. This information was provided to you by an ASPIDA support specialist.
Click the More Settings … button to configure additional Internet email Settings.
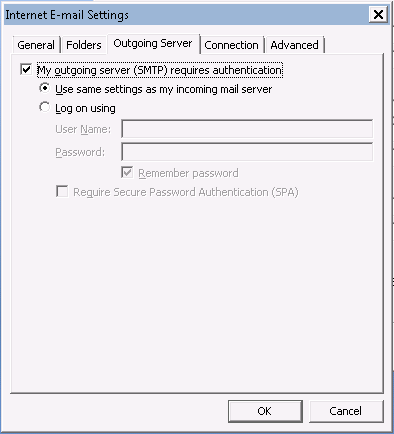
Click the Outgoing Server tab and select the My outgoing server (SMTP) requires authentication setting.
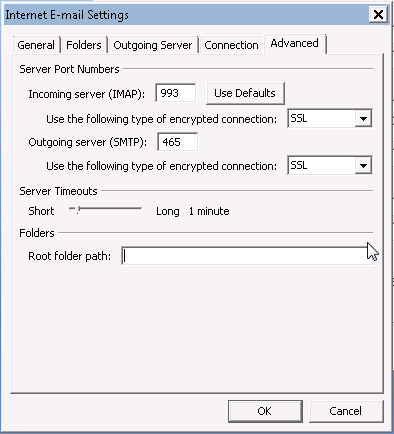
Click the Advanced tab and make the following changes.
- Under Incoming server (IMAP).., change the Use the following type of encrypted connection to use SSL. Leave the default (993) setting for the port number.
- Under Outgoing server (SMTP)… change the Use the following type of encrypted connection to use SSL. Leave the default (465) setting for the port number.
Click OK to complete the configuration of the additional internet email settings.
Click the Test Account Settings… button.
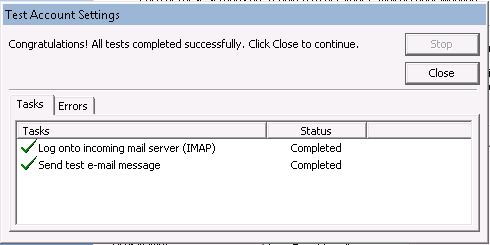
If you configured all the settings properly then you should receive a Completed status for the incoming and outgoing test. Click Close to dismiss the Test Account Settings window.
Click Next in the Add New Account Window.
Click the Close button to complete the configuration. At this time you should receive a Congratulations! message indicating that the account was successfully added.
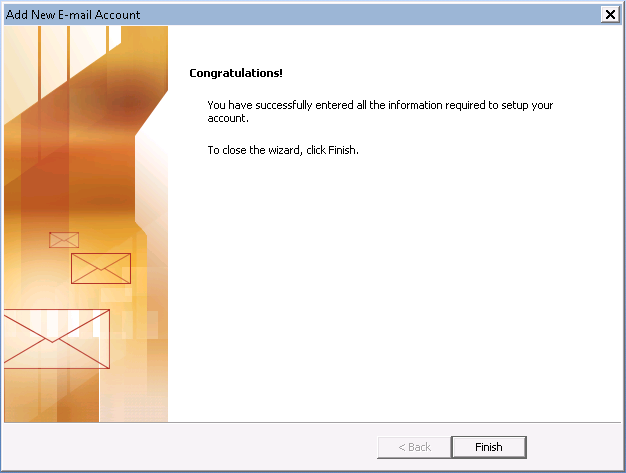
Click Finish to close the Add New Account window.
Important!
Subscribing to Folders
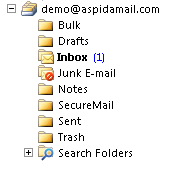
By default when you add a new Aspida Mail IMAP account to Microsoft Outlook the following folders should be automatically created/subscribed.
If some of the folders (i.e. Bulk, Drafts, SecureMail) are not automatically subscribed to, you can add them manually. In order to do this you must complete the following steps:
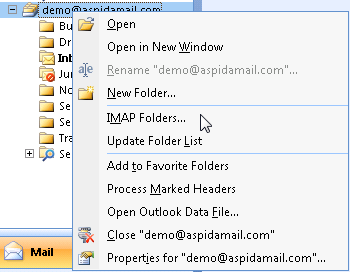
Open Outlook and right click on your Aspida Mail account. Click on IMAP Folders… in the menu options.
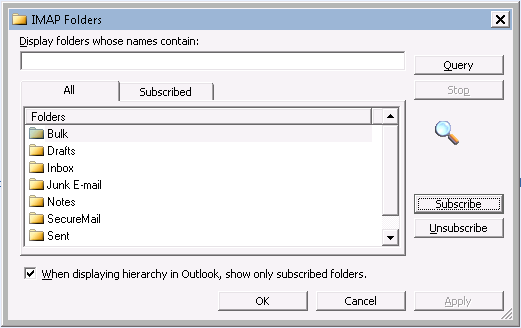
In the IMAP Folders dialog click the Query button to generate a list of all IMAP folders.
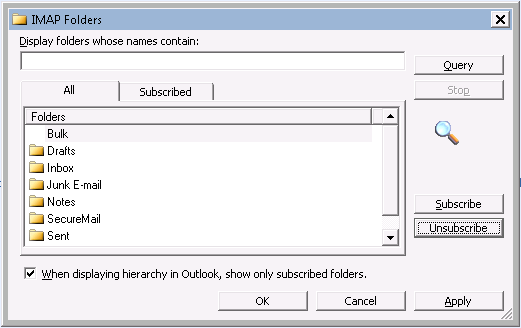
In the Folders list click each of the unsubscribed folders (Bulk) and click the Subscribe button. Once you have subscribed to all the IMAP folders you will see a folder icon next each to each folder. Click the OK to close the dialog.
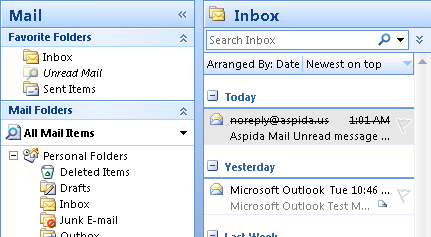
You should now see all the folders under your Aspida Mail account in Microsoft Outlook.

Note: The Bulk IMAP folder is your personal quarantine. This is where Aspida Mail places messages that it detects as possible spam. Subscribing to this folder enables you to monitor your quarantined email to make sure that none of them are actually legitimate email that were mistaken for spam.
When deleting messages out of your Aspida Mail IMAP folders, you will notice that the item is displayed in strikethrough text in the header list. However, the item is not removed from the Aspida Mail IMAP folders until a purge is completed.
With Microsoft Outlook you have 2 options to remove the deleted items from your Inbox view. The first option is to change your view so that the items marked for deletion do not appear. In order to do this complete the following steps:
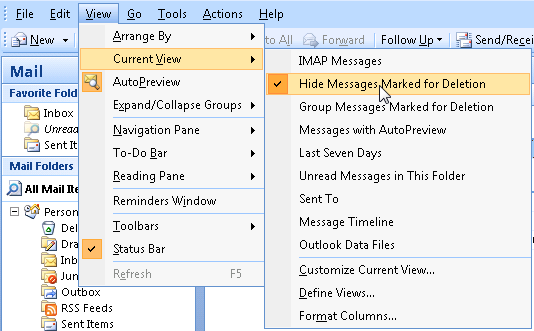
On the View menu, select Current View, and then click Hide Messages Marked for Deletion.
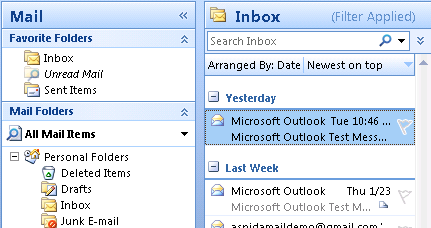
This will automatically hide all of the items in your Aspida Mail IMAP folders that have been marked for deletion.
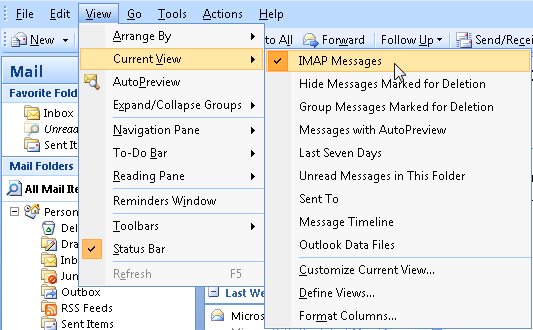
If you want to view the items that have been marked for deletion, on the View menu, select Current View, and then click IMAP Messages. This will allow you to view all of your items in your IMAP folders.
The second option to remove the deleted items from your Inbox view is to purge the items from your Outlook account. Purging items will permanently delete any emails that have been marked for deletion. To manually purge delete items:
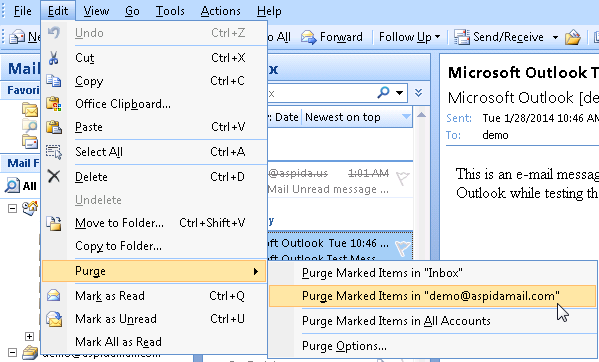
On the Edit menu, select Purge, and then click Purge Marked Items in (your Aspida Mail IMAP account), shown here as “[email protected]”. This will conduct a purge at that specific point in time. Note that you will have to repeat this process as needed.
If you do not want to manually purge deleted items, Outlook can be set up to automatically purge as you switch between folders. To automatically purge items:
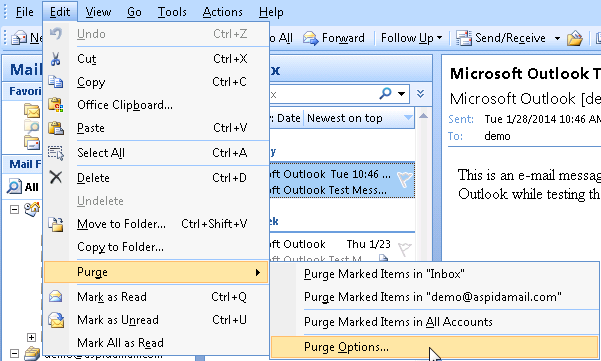
On the Edit menu, select Purge, and then click Purge Options.
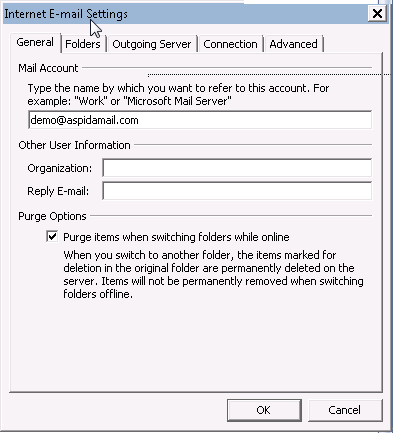
Click on the General tab, then under the Purge Options, check the box for Purge items when switching folders while online.
Note: Purging items that are marked for deletion, will permanently delete these items from your Aspida Mail account. These messages will not be able to be restored. Please keep this in mind when selecting a method for dealing with deleted messages.
